Configurer la prise en compte de l’onduleur avec un système linux

-Vérifier le module « usbhid » et l’ajouter au fichier /etc/modules s’il n’est pas présent pour qu’il s’execute au démarrage du serveur
Sinon, il est possible de lancer le module en exécutant la commande suivante:
#modprobe usbhid
-Créer le noeud dev si ce n’est pas fait:
#mknod /dev/usb/hiddev0 c 180 96
-Cas Installation avec le logiciel de gestion de l’onduleur « nut »
#apt-get install nut nut-usb
Les deux daemons linux doivent être lancés: upsd et upsmon
Lancement de nut:
# /etc/init.d/nut start
La première configuration se trouve dans le fichier /etc/default/nut
Exemple de conf:
# start upsd
START_UPSD=yes

# start upsmon
START_UPSMON=yes

La deuxième configuration se trouve dans /etc/nut/ups.conf (à créer) et il contient les lignes suivantes:
# define the ups driver and the port where it’s connected
[myups]
driver=hidups
port=/dev/usb/hiddev0

/etc/nut/upsd.conf(version 2xxx):
# access-lists:
ACL all 0.0.0.0/0
ACL localhost 127.0.0.1/32
ACL lan 192.168.1.0/24

/etc/nut/upsd.conf(version 1.4xxx):
# rights:
ACCESS grant monitor localhost
ACCESS grant monitor lan
ACCESS deny all all
# rights:
ACCEPT localhost lan
REJECT all
Le fichier /etc/nut/upsd.users est à créer(gestion des utilisateurs)
# define the user rights according to the ACL in upsd.conf
[user]
password = mypassword
allowfrom = localhost lan
upsmon master

et aussi le fichier /etc/nut/upsmon.conf
# define the ups to monitor and the permissions
MONITOR myups@localhost 1 user mypassword master

# define the shutdown comand
SHUTDOWNCMD « /sbin/shutdown -h now »

A la fin, executer le service:
#/etc/init.d/nut start

Pour info:
#upsc myups@localhost indique l’état de l’onduleur
Et pour les tests, utiliser la commande:
#upsmon -c fsd pour faire une simulation de vidage de la batterie de l’onduleur

Commands unix/linux/macosx

Commands: http://sites.google.com/site/jamesnguyen/notes/dns

[general]

Clear the garbage on your screen after trying to view binary files or such

$ echo ^v^o
or
$ reset
Press ctrl+r in bash to reverse search command history; ctrl+r again to cycle
$ ^r
Erase a word
$ ^w
Runs a command with the last argument of the previous command
$ cmd !$
Runs the previous command replacing the last argument
$ !:- new_argument
Change to last working directory
$ cd –
View the system console remotely
# fold -w 80 /dev/vcs1
[alom]
Return alom console
#.
[baytech]
Return to the baytech console
; 5 times
[colors]
Colorize log files
$ tail -f /var/log/messages | ccze -A
or
$ tail -f FILE | perl -pe ‘s/KEYWORD/\e[1;31;43m$&\e[0m/g’
Colorize grep in less
$ grep –color=always | less -R
[operators]
Bash ternary operator
$ true && { echo sucess; } || { echo failed; }
or
[[ test_condition ]] && { if_true_do_this; and this; } || { otherwise_do_that; }
[json]
Validates and pretty-prints the json content from the url

$ curl -s « http://feeds.delicious.com/v2/json?count=5 » | python -m json.tool | less -R

[output]
Using process substitution, we can ‘trick’ tee into sending a command’s STDOUT to an arbitrary number of commands. The last command (command4) in this example will get its input from the pipe
$ some_command | tee >(command1) >(command2) >(command3) … | command4
[disk]
Destroy the MBR
# dd if=/dev/zero of=/dev/sda bs=446 count=1
Disable fsck on critical servers
# tune2fs -c 0 -i 0 /dev/mapper/VolGroup00-LogVol00
[files]
Extract file direct from URL without saving to disk
$ wget -qO – « http://www.tarball.com/tarball.gz » | tar zxvf –
Renames files with spaces to underscores
$ for file in *;do mv $file ${file// /_};done
Edit remote files
$ vim scp://username@host//path/to/somefile
Remote and local diff
$ vimdiff scp://username@host//path/to/file /path/to/file
Share file through HTTP port 80
$ nc -w 5 -v -l -p 80 < file.ext
Tail a logfile over the network on port 1234
$ tail -F /var/log/messages | nc -l 1234
Kills the process locking the file
$ fuser -k filename
Compares directories recursively
$ diff -urp dir1/ dir2/
Diff output of two commands
$ diff <(tail -10 file1) <(tail -10 file2)
Converting camelCaseWords to under_score_words and vice versa
$ sed ‘s/\([A-Z]\)/_\l\1/g’ file.txt | sed ‘s/^_\([a-z]\)/\1/g’
and
$ sed ‘s/_\([a-z]\)/\u\1/g’ file.txt | sed ‘s/^\([a-z]\)/\u\1/g’
Download from Rapidshare Premium using wget
$ wget -c -t 1 –load-cookies ~/.cookies/rapidshare
Delete files from a directory 30 days old efficiently and takes care of spaces in filenames
$ find /path -type f -print0 | xargs -0 -r rm

[process]
Greps for a process minus the grep line
$ ps -ef | grep [p]rocessname
Find the process causing high throughput
# iftop <- tool to find the connection with top throughput
# netstat -ap <- get the process that has the connection open
# netstat -anp <- in case our hostname from iftop has no forward lookup, we’ll get the ip
[memory]
Free memory on a linux host
sync; echo 3 | sudo tee /proc/sys/vm/drop_caches
[accounts]
Change passwd non-interactive
echo ‘newpasswd’ | passwd –stdin user

[awk/sed]

Find a PATTERN and create betweenPATTERNhere

$ sed -e ‘s/pattern/between&here/g’ filename
[References]
http://www.commandlinefu.com/commands/browse
http://www.itworld.com/operating-systems/100018/unix-tip-sed-awk-still-friendly-after-all-these-years
http://www.osnews.com/story/21004/Awk_and_Sed_One-Liners_Explained

host, iftop, netstat, tcpdump, ngrep, nmap, ping, iptables, nethogs, service

[host]
Query SRV record
$ host -t SRV _sip._udp.sms-proxy-01.bandwidthclec.com
[iftop]
Displays the top bandwidth source and destination usage
# iftop
[netstat]

Find out which programs listen on which TCP ports

# netstat -tlnp
Monitor connections for HTTP including listen, count and sorting
# watch « netstat -plan|grep :80|awk {‘print \$5’} | cut -d: -f 1 | sort | uniq -c | sort -nk 1 »
[tcpdump]
Get Cisco network information
# tcpdump -nn -v -i eth0 -s 1500 -c 1 ‘ether[20:2] == 0x2000’
Troubleshooting DHCP
# tcpdump -vv -i eth0 port 67 or port 68

[ngrep]
Capture all SIP packages on 5060 on all interfaces

# ngrep -W byline -td any . port 5060

[nmap]
Port scan in stealth mode with version detection and attempt to identify the OS and no ICMP pings
# nmap -sS -sV -O -P0 <target>
or
# nmap -sS -A -P0 <target>
Get a list of servers with a specific port open
$ nmap -sT -p 80 -oG – 192.168.1.* | grep open

[ping]
Find all active IPs on the nework
$ ping -c2 192.168.1.255 >/dev/null; arp -a
[iptables]

Flush all rules
# iptables –flush
Block known dirty hosts from reaching your machine
$ wget -qO – http://infiltrated.net/blacklisted|awk ‘!/#|[a-z]/&&/./{print « iptables -A INPUT -s « $1″ -j DROP »}’
[nethogs]
Monitor bandwidth by pid
# nethogs -p eth0
[service]
Return external IP
$ curl ip.appspot.com
TODO: write my own service reporting ports open and possible vulnerabilities
$ curl scan.appspot.com

Show me all URGENT (URG) packets…

# tcpdump ‘tcp[13] & 32!=0’

Show me all ACKNOWLEDGE (ACK) packets…

# tcpdump ‘tcp[13] & 16!=0’

Show me all PUSH (PSH) packets…

# tcpdump ‘tcp[13] & 8!=0’

Show me all RESET (RST) packets…

# tcpdump ‘tcp[13] & 4!=0’

Show me all SYNCHRONIZE (SYN) packets…

# tcpdump ‘tcp[13] & 2!=0’

Show me all FINISH (FIN) packets…

# tcpdump ‘tcp[13] & 1!=0’

Show me all SYNCHRONIZE/ACKNOWLEDGE (SYNACK) packets…

# tcpdump ‘tcp[13] & =18’

[references]
http://danielmiessler.com/study/tcpdump/

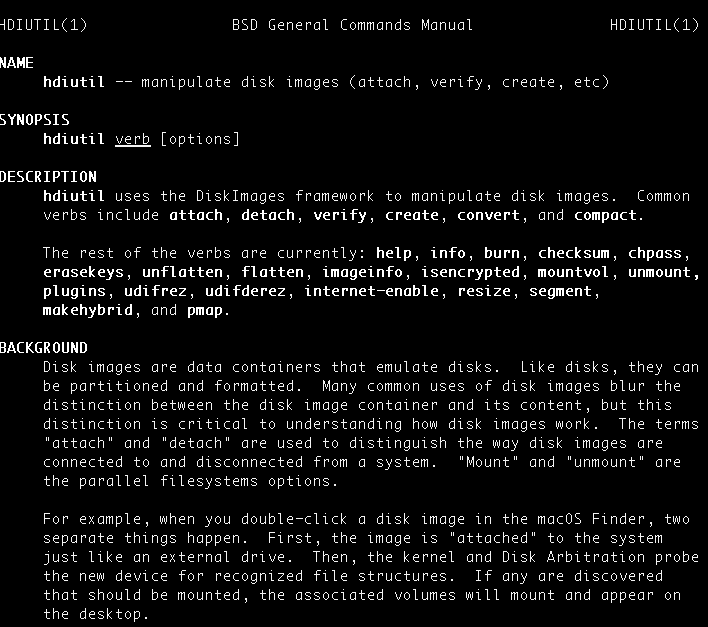
Quelques fonctions de la commande hdiutil(mac osx)(HardDiskImageUtil) et asr(Apple Software Restore)

Cette commande hdiutil est propre au système macosx.

Type de disque possible(.dmg,.smi,.img):

-UDIF:Universal Disk Image Format (UDIF), le format standard

-SPARSE:(limite de la taille du disque est 128Pbytes)

-SPARSEBUNDLE:(limite de la taille du disque est 8Ebytes)

Attention, la taille occupée par l’image disque est la taille réelle sur le disque physique.

Il est possible de partitionner l’image disque avec un autre système de fichiers(hfs,hfs+,iso,joliet,udf).

Conversion de filename.dmg en savefle.iso
#hdiutil convert /path/to/filename.dmg -format UDTO -o /path/to/savefile.iso

Conversion du répertoire foo en image.iso
#hdiutil makehybrid -o ~/image.iso ~/foo -iso -joliet

Création de disque image(.dmg) à partir d’un dossier source: ex:
#/usr/bin/hdiutil create -srcfolder “/Applications/Install macOS Mojave.app” ~/Desktop/mojave.dmg

Conversion de mon-cdr.dmg en format cd-r moncdr.cdr

#hdiutil convert mon-cdr.dmg -format UDTO -o moncdr

Exemple de création de disque de type  mémoire RAM(voir le man de hdiutil)

NUMSECTORS=128000 # a sector is 512 bytes
mydev=`hdiutil attach -nomount ram://$NUMSECTORS`
newfs_hfs $mydev
mkdir /tmp/mymount
mount -t hfs $mydev /tmp/mymount

Augmentation(resize) de la taille de l’image disque:
#hdiutil resize -size taille_finale mon_image_disk_dmg

Il est conseillé de compacter(option: compact) de temps en temps pour défragmenter votre image disque.

Il y a la possibilité de crypter l’image disque(voir option: encrypt)

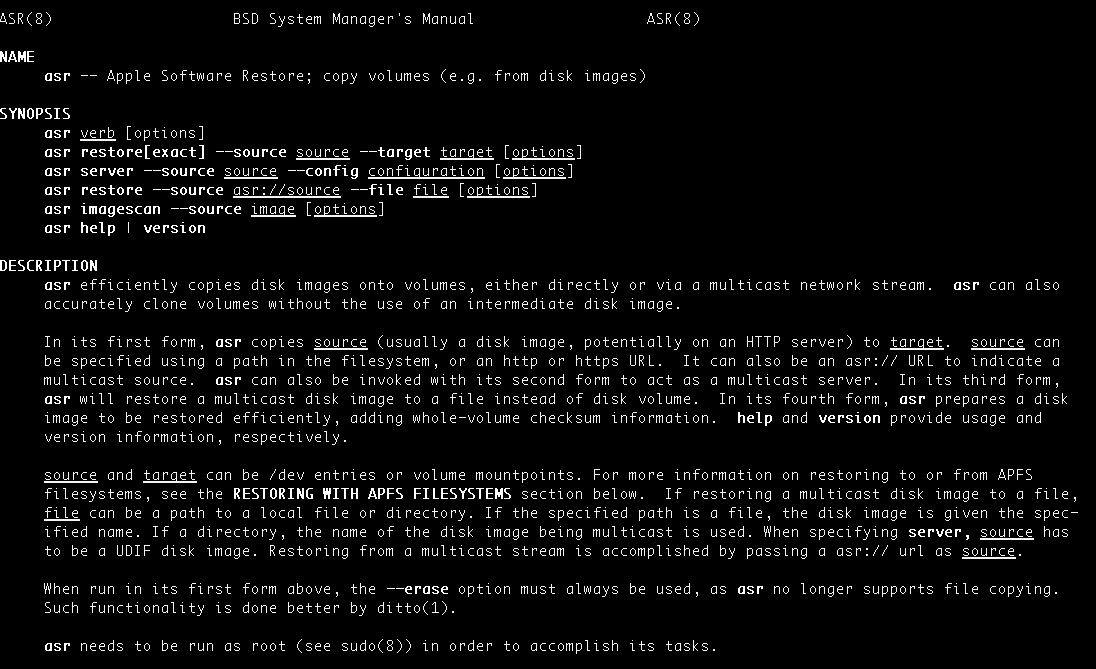
asr(Apple Software Restore): permet entre autre de restaurer une partition vers une autre partition d’un disque:
#asr restore –source /dev/disk2s11 –target /dev/disk3s1 –erase –noverify

Ici, un extrait du manuel de asr:

MTBF(mean time between failures)

Temps moyen entre pannes

Le temps moyen entre pannes, expression souvent désignée par son sigle anglais MTBF (mean time between failures), est une des valeurs qui indiquent la fiabilité  d’un composant d’un produit ou d’un système.
C’est la moyenne arithmétique du temps entre pannes d’un système réparable.

Source wiki:

http://fr.wikipedia.org/wiki/Temps_moyen_entre_pannes#Calculs_de_MTBF